• 10 Money Saving Hacks to Budget for your Disney Vacation

    Let’s be honest: planning a Disney World vacation is exciting, but figuring out how much it’s actually going to cost? Not quite as magical.

    Between park tickets, resort accommodations, dining, Lightning Lane passes, transportation, souvenirs, snacks, and all the little extras, the expenses can add up quickly.

    But here’s something I wish more people knew: You don’t have to pay for your entire Disney vacation all at once!

    With a little planning, you can spread out the cost, take advantage of discounts, and pay for much of your vacation before you even arrive.

    My favorite strategy is to treat Disney vacation planning like a savings project. Set a budget, establish a payment timeline, purchase discounted Disney gift cards when opportunities arise, and take care of as many expenses as possible ahead of time.

    The goal? Arrive at Disney knowing your major vacation expenses are already taken care of so you can focus on making memories instead of worrying about your bank account.

    Let’s break it down!


    1. How Much Does a Disney World Vacation Actually Cost?

    The cost of a Disney vacation depends on several factors:

    • How many people are traveling
    • How many days you’re staying
    • Which Disney resort you choose
    • What time of year you visit
    • Whether you purchase a dining plan
    • Whether you purchase Lightning Lane passes
    • How much you plan to spend on souvenirs, snacks, and extras

    For a family of four staying approximately five nights and spending four days in the parks, here’s a general example of what you might budget.

    Expense

    Estimated Cost

    Disney resort

    $1,500–$2,500

    Park tickets

    $2,000–$2,400

    Flights

    $800–$1,200

    Transportation

    $100–$250

    Food and dining

    $800–$1,200

    Lightning Lane

    $300–$600

    Souvenirs and extras

    $200–$400

    Estimated total

    $5,700–$8,550

    These are illustrative planning estimates, not current Disney quotes. Actual costs vary significantly based on dates, resort, ticket type, airfare, party size, and purchasing choices. A dining plan would also change how you budget for meals.

    The important thing is to create a realistic budget before you book. Don’t forget the little expenses! Those Mickey pretzels, popcorn buckets, resort snacks, and last-minute purchases can add up.

    My tip: Build your budget around the vacation you actually want to have, not the cheapest possible version. It’s much easier to make adjustments before booking than to be surprised by expenses later.

    2. Book Your Vacation With the Full Picture in Mind

    One of my biggest recommendations is to include EVERYTHING you think you want when you initially book your Disney vacation.

    Think about:

    • Resort accommodations
    • Park tickets
    • Park hopper options
    • Dining plan (if applicable)
    • Any other package add-ons you know you want

    Why?

    Because it’s much easier to see the full financial picture upfront. You can always make adjustments, remove options, or change plans as you get closer to your trip, subject to Disney’s booking terms and deadlines.

    I personally prefer knowing what my vacation is going to cost as early as possible.

    When you book a Disney vacation package, you generally pay a deposit and then have until the applicable final payment deadline to pay the remaining balance. For many Walt Disney World vacation packages, that deadline is 30 days before arrival, but always confirm the specific date on your reservation.

    And here’s the best part: You can make payments at your own pace!

    You don’t have to make monthly payments, and you don’t have to wait until the final payment deadline to pay. You can make payments whenever it works for your budget.

    I love this because it allows you to break a large vacation expense into smaller, more manageable chunks.

    Instead of worrying about paying $6,000 all at once, you can create a plan to pay $500 per month over the course of a year.

    Just make sure you know your final payment date and have your balance paid by then.

    3. The Disney Gift Card Hack: One of My Favorite Ways to Save Money

    If you take away one tip from this entire blog post, let it be this one!

    Buy discounted Disney gift cards whenever you can find them.

    This is one of my favorite ways to save money on a Disney vacation, and if you really put the effort into it, the savings can add up FAST.

    I regularly watch for discounted Disney gift cards at places like:

    • Target
    • Sam’s Club
    • Costco
    • Other retailers offering gift card promotions

    Sometimes you can purchase Disney gift cards at a discount, receive a percentage back through a rewards program, or use a qualifying credit card offer.

    For example, let’s say you purchase $1,000 worth of Disney gift cards at a 5% effective discount.

    That’s $50 in savings without changing anything about your vacation!

    Now imagine doing that with $3,000 or $4,000 worth of vacation expenses.

    Gift Card Spending

    5% Effective Savings

    $500

    $25

    $1,000

    $50

    $2,000

    $100

    $3,000

    $150

    $4,000

    $200

    That’s money you can put toward souvenirs, meals, or something extra for the kids!

    A few things to remember:

    • Discounts and promotions aren’t always available.
    • Target Circle offers and other promotions can have exclusions.
    • Sam’s Club and Costco availability and pricing can vary.
    • Check the terms before purchasing.
    • Make sure you’re purchasing legitimate Disney gift cards from trusted retailers.

    You can generally use Disney gift cards toward eligible Disney vacation package payments, park purchases, merchandise, and dining expenses.

    I recommend keeping a spreadsheet or running list of every gift card you purchase, including the amount and remaining balance. Keep the physical cards or digital codes somewhere secure.

    My strategy: When I see a good discount, I purchase gift cards and use them toward my upcoming vacation balance. It’s essentially giving yourself a little discount on expenses you were already planning to pay!

    4. Create a Disney Vacation Payment Timeline

    This is where you can really take the stress out of paying for a Disney vacation.

    Instead of waiting until the final payment deadline, create a timeline that spreads your expenses across the months leading up to your trip.

    Let’s say your vacation package costs $6,000, and you have 12 months before your final payment is due.

    You could break it down like this:

    Timeline

    Payment Goal

    Booking

    Initial deposit

    10 months before

    $500

    8 months before

    $500

    6 months before

    $1,000

    4 months before

    $1,000

    2 months before

    $1,000

    30 days before

    Remaining balance

    This is just an example. You can pay more frequently, less frequently, or whenever you have extra money available.

    The important part is having a plan!

    My favorite budgeting trick

    Create a separate Disney vacation savings category in your budget.

    Every paycheck, set aside a specific amount. When you purchase discounted Disney gift cards, add those to your vacation fund.

    You can even make a visual savings tracker so the kids can see how close you’re getting to your vacation!

    The more you pay ahead of time, the less financial pressure you’ll have when the trip finally arrives.

    5. Don’t Forget to Budget for Lightning Lane!

    If you plan on purchasing Lightning Lane passes, make sure you account for them BEFORE your vacation.

    This is one expense that can catch families off guard.

    Depending on the park, date, type of Lightning Lane, and size of your party, the cost can add up quickly.

    If you have a larger family or are traveling with a group, this is especially important.

    I recommend:

    • Researching the current Lightning Lane pricing for your travel dates.
    • Deciding which parks you want to purchase Lightning Lane for.
    • Determining whether you’ll purchase individual Lightning Lane selections.
    • Setting aside a specific amount for these purchases.

    Remember that Lightning Lane pricing varies by date and attraction, and availability is not guaranteed.

    If you know you’ll be purchasing them, start saving for this expense early rather than trying to squeeze it into your vacation spending money.

    6. Pre-Purchase Disney Essentials to Avoid Overspending in the Parks

    This is another area where you can save a surprising amount of money.

    Disney merchandise is adorable, but it can get expensive!

    Between matching shirts, Mickey ears, spirit jerseys, sweatshirts, toys, and accessories, it’s easy to spend hundreds of dollars before you realize it.

    My recommendation? Purchase some of your Disney essentials BEFORE you leave home.

    Some of my favorite places to look include:

    • Target
    • Amazon
    • Walmart

    You can find reasonably priced Disney-themed clothing, accessories, water bottles, ponchos, fans, and other vacation necessities.

    Some things worth purchasing ahead of time:

    • Disney-themed shirts for the family
    • Mickey ears
    • Cooling towels
    • Portable fans
    • Autograph books
    • Glow sticks
    • Rain ponchos
    • Refillable water bottles
    • Park bags

    This doesn’t mean you shouldn’t buy anything at Disney!

    I actually think part of the fun is shopping at the resorts and parks. There are certain souvenirs, exclusive merchandise, and special items you simply can’t get anywhere else.

    But by purchasing some things ahead of time, you can be more intentional about what you spend inside the parks.

    My rule: Buy the practical things ahead of time and save some of your souvenir budget for the special Disney merchandise you really want.

    7. Set Aside Spending Money for Your Actual Vacation

    Once you’ve paid for your resort, tickets, and other major expenses, you’ll still want some spending money for the trip itself.

    I recommend creating a separate budget for:

    • Snacks and treats
    • Quick-service meals if not included in a dining plan
    • Drinks
    • Souvenirs
    • Special experiences
    • Unexpected expenses

    You can even purchase additional discounted Disney gift cards specifically for this spending money.

    For example, you might decide that each family member gets a certain amount to spend on souvenirs.

    This is a great way to let kids enjoy shopping without feeling like every purchase is coming out of an unlimited budget.

    It also gives you a little more freedom to enjoy the vacation without constantly checking your bank account.

    8. Your Disney Vacation Budget Checklist

    Here’s a simple checklist to help you get started.

    Before Booking

    • ☐ Decide on your travel dates.
    • ☐ Determine how many nights you’ll stay.
    • ☐ Research resort options.
    • ☐ Estimate park ticket costs.
    • ☐ Decide whether you’ll purchase a dining plan.
    • ☐ Estimate airfare and transportation.
    • ☐ Establish your total vacation budget.

    After Booking

    • ☐ Record your deposit and remaining balance.
    • ☐ Write down your final payment deadline.
    • ☐ Create a monthly or paycheck-based payment plan.
    • ☐ Start purchasing discounted Disney gift cards.
    • ☐ Track gift card balances.
    • ☐ Set aside money for Lightning Lane.

    2–3 Months Before

    • ☐ Reassess your remaining vacation balance.
    • ☐ Purchase any remaining discounted gift cards.
    • ☐ Purchase park essentials ahead of time.
    • ☐ Set aside souvenir and snack money.
    • ☐ Confirm transportation and travel arrangements.

    30 Days Before

    • ☐ Make sure your vacation package is paid in full by the applicable deadline.
    • ☐ Confirm reservations and travel details.
    • ☐ Organize your gift cards and spending money.
    • ☐ Finish packing!

    9. The Goal: Arrive at Disney With Your Vacation Already Paid For

    At the end of the day, the goal isn’t necessarily to spend the least amount of money possible.

    It’s to plan ahead so you can actually ENJOY the vacation you’ve worked so hard to save for.

    Disney vacations are expensive, but they don’t have to feel financially overwhelming.

    By booking with the full picture in mind, making payments at your own pace, taking advantage of discounted gift cards, and purchasing some essentials ahead of time, you can significantly reduce the financial stress.

    And honestly, there’s something so satisfying about arriving at Disney knowing your resort and major vacation expenses have already been taken care of.

    Now you can focus on the fun stuff: the rides, the snacks, the fireworks, the characters, and all those little moments that make Disney so special.

    Because the magic should be in the vacation, not in figuring out how you’re going to pay for it!

    10. Take Advantage of the Disney Visa Credit Card

    Another tool worth looking into when planning a Disney vacation is the Disney Visa Credit Card through Chase.

    If you’re someone who visits Disney regularly or has a big Disney vacation planned, this is something I would definitely research!

    One of the things I love about the Disney credit card is that you can earn Disney Rewards Dollars on everyday purchases and put those rewards toward future Disney expenses.

    There are also typically new cardmember sign-up offers, which can include a Disney gift card and a statement credit after meeting a qualifying spending requirement.

    For example, the offers currently advertised include:

    • A Disney Visa Card offer with a $100 Disney Gift Card eGift upon approval and a $50 statement credit after spending $500 in the first three months.
    • A Disney Premier Visa offer with a $200 Disney Gift Card eGift and a $100 statement credit after spending $500 in the first three months.
    • A Disney Inspire Visa offer with a $300 Disney Gift Card eGift and a $200 statement credit after spending $1,000 in the first three months.

    Offers change, so check the current terms before applying. Access your Disney Chase card here ✨

    Different cards offer different rewards

    There are currently three main options:

    • Disney Visa: No annual fee and earns 1% in Disney Rewards Dollars on qualifying purchases.
    • Disney Premier Visa: $49 annual fee, with 2% rewards on eligible purchases at most U.S. Disney locations, gas stations, grocery stores, and restaurants.
    • Disney Inspire Visa: $149 annual fee, with 3% rewards at most U.S. Disney locations and gas stations, 2% at grocery stores and restaurants, and 1% on other purchases.

    The higher-tier cards also offer additional rewards on qualifying Disney streaming subscriptions.

    Why I think it’s worth considering

    Think about all the everyday purchases you’re already making: groceries, gas, dining out, and other household expenses.

    If you’re paying those expenses with a rewards card and paying the statement balance in full every month, you can accumulate rewards that can eventually go toward your Disney vacation.

    You can redeem Disney Rewards Dollars for eligible expenses like:

    • Disney park tickets
    • Disney resort stays
    • Disney dining
    • Disney merchandise
    • Disney Cruise Line expenses

    There are also additional perks, including select merchandise and dining discounts at Disney destinations, exclusive cardmember experiences, and special financing on qualifying Disney vacation packages.

    My favorite part is that you’re essentially turning everyday spending into a little extra Disney vacation money!

    A quick reminder: A credit card is only a money-saving tool if you’re using it responsibly. Don’t spend extra just to earn rewards, and don’t carry a balance to chase points. Interest charges can quickly outweigh the value of the rewards. Also consider annual fees when deciding whether a higher-tier card makes sense for your spending habits.

    I recommend looking at the different card options, comparing the rewards, and deciding whether one fits your family’s vacation budget strategy.

    Every little bit helps when you’re saving for a Disney vacation!


    A Little Disney Planning Goes a Long Way!

    If you’re getting ready to plan your next Disney vacation, check out my Magic Made Simple guides for helpful planning tips, Lightning Lane strategies, packing lists, and more!

    Happy planning! ✨

  • Let’s be honest: a Disney World vacation with kids is magical, exciting, unforgettable… and sometimes a little chaotic.

    Between long park days, overstimulated little ones, snack breaks, bathroom trips, tired feet, and unpredictable Florida weather, having a plan can make all the difference.

    The secret to enjoying Disney with kids isn’t trying to fit everything into one day. It’s knowing how to make the experience easier, more comfortable, and a little less stressful for everyone.

    Whether you’re visiting Disney World for the first time or you’re a returning Disney family, here are 15 tips and must-have items to help make your park days smoother.

    1. Bring a Stroller (Even If Your Kids Don’t Normally Use One)

    One of the biggest mistakes parents make is underestimating how much walking happens at Disney World.

    You can easily walk several miles in one park day. Even kids who normally love walking can get tired quickly.

    A stroller gives little ones a place to rest, helps carry park essentials, and gives everyone a break when the afternoon exhaustion kicks in.

    Pro tip: If you’re traveling with older kids, consider whether a stroller rental might still be worth it for especially long park days.

    2. Pack a Portable Fan

    Florida heat is no joke, especially during the summer months.

    A stroller fan or handheld portable fan can make waiting in lines, watching parades, and walking between attractions much more comfortable.

    My recommendations:

    • Rechargeable stroller fan
    • Portable handheld fan
    • Neck fan for older kids and adults

    Don’t forget to charge them before leaving your hotel!

    3. Bring Your Own Snacks

    Disney has plenty of delicious snacks, but having familiar snacks on hand can be a lifesaver.

    Kids don’t always get hungry when it’s convenient, and waiting in line for food when everyone is already hungry can quickly turn into a meltdown.

    Pack things like:

    • Granola bars
    • Crackers
    • Applesauce pouches
    • Fruit snacks
    • Pretzels
    • Individual snack bags

    Having a few easy options in your park bag can save time and money.

    4. Use a Portable Phone Charger

    Your phone is going to get a workout at Disney.

    Between the My Disney Experience app, mobile food ordering, Lightning Lane selections, photos, videos, and checking wait times, your battery can disappear faster than you expect.

    I recommend bringing at least one fully charged portable power bank and an extra charging cord.

    If you’re traveling with multiple family members, consider bringing a multi-port charging station for your hotel room, too.

    Portable All-in-one Charger
    Slim Fit Portable Charger

    5. Pack Extra Clothes for Younger Kids

    Even if the forecast looks perfect, accidents happen.

    Between water rides, spilled drinks, unexpected rain showers, and sweaty afternoons, having an extra outfit can save the day.

    I like keeping a small packing cube or waterproof bag inside the park bag with:

    • One complete change of clothes
    • Extra underwear
    • Socks
    • A lightweight shirt
    • A plastic bag for wet or dirty clothes

    You may not need it, but you’ll be glad it’s there when you do!

    6. Take Midday Breaks

    This might be one of the most important tips on the entire list.

    It’s tempting to stay in the parks from rope drop until closing, especially when you have a long list of attractions you want to experience.

    But tired kids can quickly turn an amazing day into an exhausting one.

    If you’re staying at a Disney resort, consider heading back to the hotel for a swim, a nap, or some downtime during the hottest part of the afternoon.

    Even if you don’t leave the park, find a quiet indoor attraction or shaded place to sit and recharge.

    Remember: You don’t have to do everything!

    7. Bring Comfortable, Broken-In Shoes

    This applies to everyone in the family!

    Disney is not the place to break in a brand-new pair of shoes.

    Choose comfortable sneakers or walking shoes that your kids have worn before. Consider packing an extra pair of socks in case feet get sweaty or wet.

    A few other helpful items:

    • Blister bandages
    • Anti-chafing balm
    • Extra socks
    • Comfortable sandals for the hotel pool

    Happy feet make for happier park days.

    Travel First Aid Kit
    Anti-Chaf Stick

    8. Use a Waterproof Park Bag

    Between Florida rain showers, water rides, and spilled drinks, keeping your belongings protected is important.

    Look for a lightweight backpack with multiple compartments and easy-to-clean material.

    I also recommend bringing a few waterproof pouches for:

    • Phones
    • Wallets
    • Important documents
    • Wet swimsuits or clothing

    A little organization goes a long way when you’re traveling with kids.

    Disney – waterproof bag

    9. Bring Refillable Water Bottles

    Staying hydrated is especially important when you’re spending hours outside in the Florida heat.

    Bring refillable water bottles for everyone in the family. You can refill them throughout the day, and complimentary cups of ice water are available at participating quick-service locations.

    Insulated bottles can help keep drinks cooler throughout the day.

    Yeti Water Bottle

    10. Don’t Overpack Your Park Bag

    It can be tempting to bring everything you might possibly need.

    But remember, you’re going to be carrying that bag around all day!

    Stick to the essentials:

    • Sunscreen
    • Portable charger
    • Snacks
    • Refillable water bottles
    • Ponchos
    • Hand sanitizer
    • Wipes
    • Small first-aid kit
    • Extra clothes for younger kids
    • Cooling towels

    Use small packing pouches to keep everything organized and easy to find.

    11. Plan Your Lightning Lane Strategy Ahead of Time

    If you’re planning to use Lightning Lane, don’t wait until you arrive at the park to figure out how it works.

    Spend some time before your vacation learning which attractions are the highest priority for your family.

    Think about:

    • Which rides are must-dos?
    • Which attractions have height requirements?
    • Which rides typically have longer waits?
    • Which attractions are best for younger children?

    Having a strategy can save you a lot of time standing in line.

    If you need help getting started, check out our Disney Lightning Lane planning guide!

    Lightning Lane Set Up Guide

    12. Pack Ponchos for Everyone

    Florida weather can change quickly.

    A sunny morning can turn into a rainy afternoon before you know it.

    Instead of purchasing ponchos in the parks, pack lightweight reusable or disposable ponchos for the family.

    They’re inexpensive, easy to store, and can be used to protect your stroller and park bag, too.

    Ponchos
    Shoe Covers – These are a MUST

    13. Have a Plan for Lost Kids

    It’s not something anyone wants to think about, but crowded theme parks make it important to have a family safety plan.

    Before entering the park:

    • Make sure younger children know what a Disney cast member looks like.
    • Teach them to find a cast member if they become separated.
    • Consider an identification bracelet with a parent’s phone number.
    • Take a current photo of each child at the beginning of the day.

    A little preparation can provide extra peace of mind.

    14. Let Kids Help Choose Some Attractions

    It’s easy to get caught up in planning the perfect Disney itinerary.

    But remember, this is their vacation, too!

    Let your kids help choose a few attractions, snacks, or experiences they are most excited about.

    You might be surprised by what becomes their favorite memory.

    Sometimes the simplest experiences end up being the most magical.

    15. Lower Your Expectations (And Enjoy the Magic!)

    This might be the most important tip of all.

    You probably won’t experience every attraction, eat every snack, or follow your itinerary perfectly.

    Someone will get tired. Someone will need a bathroom break right when you’re about to board a ride. Plans will change.

    And that’s okay!

    Some of the best Disney memories happen in the moments you didn’t plan.

    Give yourself permission to slow down, enjoy the little things, and focus on making memories with your family.

    Disney Park Day Essentials: What I Wouldn’t Leave Home Without

    If I were putting together a Disney park bag for a family vacation, these are some of the items I’d prioritize:

    • Portable rechargeable fan
    • Portable phone charger
    • Refillable water bottles
    • Lightweight ponchos
    • Comfortable backpack
    • Sunscreen
    • Cooling towels
    • Waterproof pouches
    • Magnetic stroller hooks
    • Small first-aid kit
    • Extra charging cords
    • Snack container

    Final Thoughts

    A Disney vacation with kids doesn’t have to be perfectly planned to be amazing.

    A little preparation, the right essentials, and realistic expectations can make your park days so much more enjoyable.

    Remember to take breaks, stay hydrated, keep snacks handy, and leave room for a little spontaneity.

    Because at the end of the day, the goal isn’t to check every ride off your list. It’s to create memories your family will talk about for years.

    Happy planning, and may your Disney days be full of magic!

  • Disney Cruise Must-Haves: 15 Things to Pack Before You Set Sail

    There is nothing quite like getting ready for a Disney cruise! Between planning excursions, picking out outfits, and getting excited for days at sea, packing can quickly become overwhelming. But there are a few things that can make your cruise experience so much easier.

    After experiencing a Disney cruise ourselves, I put together a list of items I genuinely recommend bringing along. These are the practical little things that help keep your stateroom organized, your beach days easier, and your vacation running smoothly.

    Whether this is your first Disney cruise or you’re a seasoned cruiser, here are some things worth adding to your packing list before you set sail!

    1. Magnetic Cabin Hooks

    One of my biggest recommendations! Disney cruise stateroom walls and doors are metal, which makes magnetic hooks incredibly useful.

    Staterooms aren’t known for having tons of storage space, so these help maximize the space you have.

    What to use them for:

    ● Hanging hats and swimsuits

    ● Keeping lanyards accessible

    ● Hanging beach bags

    ● Organizing jackets and backpacks

    Magnetic Cabin Hooks

    2. Portable Drink Carrier

    This is one of those items you might not think about until you need it! A collapsible drink carrier makes it much easier to transport multiple drinks back to your room or around the ship.

    Especially helpful when you’re traveling with kids!

    Amazon find: Collapsible drink carrier or beverage caddy.

    Foldable Drink Caddy

    3. Extra Charging Stations and Cords

    Between phones, cameras, watches, tablets, and other electronics, charging space can disappear quickly when you’re sharing a stateroom.

    Bring an extra charging station and plenty of cords so everyone can keep their devices charged.

    My recommendations:

    ● Multi-device USB charging station

    ● Extra-long charging cords

    ● USB-C cables

    ● Portable power bank for port days

    Check Disney Cruise Line’s current prohibited-items policy before packing any power strips or extension cords. Standard power strips and surge protectors may not be permitted.

    4. Reef-Friendly, Bahamas-Friendly Sunscreen

    If you’re visiting the Bahamas or spending time at the beach, sunscreen is a must!

    I recommend looking for mineral-based sunscreen options that are marketed as reef-friendly. Look for products with zinc oxide or titanium dioxide, and check local regulations at your destinations.

    Don’t forget:

    ● Face sunscreen

    ● Body sunscreen

    ● SPF lip balm

    ● After-sun lotion

    Remember to reapply throughout the day!

    Mineral Sunscreen – Reef Safe!
    Mineral Face Stick

    5. Foldable Beach Bags

    A compact beach bag is a must-have for port days and excursions.

    I love bags that fold down small enough to tuck into your suitcase but open up into a full-size beach tote when you need them.

    They’re perfect for carrying:

    ● Sunscreen

    ● Towels

    ● Water bottles

    ● Snacks

    ● Wet swimsuits

    ● Sunglasses

    Compact and Cute Beach Bag

    6. Waterproof Phone Pouch

    Whether you’re heading to the beach, enjoying a water excursion, or relaxing by the pool, a waterproof phone pouch can help protect your phone from splashes and sand.

    Look for one that has been tested for water resistance and fits your specific phone.

    Waterproof Phone Case

    7. Packing Cubes

    These are great for keeping everyone’s clothes organized in a shared stateroom.

    I love separating outfits by person or category so you’re not digging through everyone’s suitcase to find what you need.

    Packing Cubes

    8. Magnetic Dry-Erase Door Sign

    A fun way to personalize your stateroom door and leave messages for family members.

    Just remember to use cruise-approved magnets and follow the ship’s decorating rules.

    Magnetic Dry Erase Board

    9. Reusable Water Bottles

    Having your own water bottle is especially convenient when heading off the ship for excursions.

    Choose an insulated bottle that keeps drinks cold throughout the day.

    Owala – 10/10 Water Bottle

    10. Small Laundry Bag

    A collapsible laundry bag helps keep dirty clothes separate from clean ones, especially when you’re traveling with the whole family.

    Travel Laundry Bag

    11. Comfortable Walking Sandals

    Port days can involve a surprising amount of walking. Bring comfortable shoes that are appropriate for your planned excursions, whether you’re exploring a port, walking around town, or heading to the beach.

    Crocs – perfect as slides and in sport mode

    12. Lanyards or Card Holders

    Your Key to the World card is important throughout your cruise. A lanyard or small card holder makes it easier to keep track of it.

    Disney Lanyard

    13. Mini First Aid Kit

    A few basic supplies can come in handy when you’re away from home.

    Consider packing:

    ● Bandages

    ● Blister pads

    ● Motion sickness supplies

    ● Pain reliever

    ● Any personal medications

    Travel First Aid Kit

    14. Waterproof Wet Bag

    A reusable wet bag is great for storing damp swimsuits after a beach day or pool afternoon.

    It keeps the rest of your beach bag from getting wet.

    Wet Bag – perfect for wet clothes and swimwear

    15. Portable Fan

    If you’re cruising during warmer months, a small rechargeable fan can be helpful during excursions and while waiting outdoors.

    Look for one that’s lightweight and easy to pack.

    Portable Fan

    My Top 5 Disney Cruise Packing Recommendations

    If you only take five things from this list, I’d prioritize:

    1. Magnetic cabin hooks

    2. Extra charging station and cords

    3. Foldable beach bag

    4. Portable drink carrier

    5. Reef-conscious sunscreen

    These are practical items that can make a noticeable difference during your trip!

    Final Thoughts

    The best part of vacation is being able to relax and enjoy the experience without worrying about all the little things you forgot to pack.

    These are some of my favorite practical recommendations based on our own Disney cruise experience. You don’t need to buy everything on every packing list, but a few thoughtful purchases before you leave can make your trip much more comfortable.

    Happy sailing!

    Disclosure: This post contains affiliate links. As an Amazon Associate, I earn from qualifying purchases at no additional cost to you.

  • Planning a Disney vacation can feel like a full-time job, but the right tools can make all the difference. Here’s how to use the My Disney Experience app to plan smarter, spend less time waiting, and enjoy more of the magic.

    If there’s one thing I recommend doing before your next Walt Disney World vacation, it’s getting comfortable with the My Disney Experience app. Think of it as your personal Disney planning assistant, all in one place!

    From checking attraction wait times and booking Lightning Lanes to ordering food, managing dining reservations, and finding your favorite Disney characters, this app can help you navigate your entire vacation.

    But if you’ve ever opened the app and felt overwhelmed by all the buttons, menus, and options, you’re not alone. There’s a lot to explore, and knowing where to start can make planning much easier.

    That’s exactly why I put together this guide! Whether you’re a first-time visitor or a seasoned Disney fan, I’m breaking down the features you need to know, the settings worth checking, and the little tricks that can save you time during your trip.

    Want a quick visual reference? Download this guide for a more visual guide including a handy checklist of the app’s most useful features, planning tips, and troubleshooting reminders.

    Let’s make Disney planning a little less stressful and a lot more magical!

    1. Get Started With the My Disney Experience App 📱

    Before you can start planning your park days, you’ll need to download the My Disney Experience app and create your Disney account.

    Once you’re logged in, take a few minutes to familiarize yourself with the home screen. You’ll find shortcuts to many of the features you’ll use throughout your vacation, including:

    ● My Tickets & Passes: View your linked park tickets and passes.

    ● Lightning Lane Passes: Explore and manage eligible Lightning Lane selections.

    ● Reserve Dining: Search for restaurants and manage dining reservations.

    ● Order Food: Place mobile food orders at participating locations.

    ● Merchandise Checkout: Use mobile checkout at participating shops.

    ● Wait Times & Showtimes: Check attraction waits and entertainment schedules.

    ● My Plans: Review your upcoming reservations and plans.

    ● Hotel Reservations: Access your resort reservation details.

    You don’t have to learn every feature at once. Start with the basics, then explore the other tools as you get closer to your trip.

    My tip: Spend a little time exploring the app before you arrive at Disney World. You’ll thank yourself when you’re standing in the park trying to decide which attraction to visit next!

    2. Link Your Resort Reservation, Tickets, and Family 🧑‍🧑‍🧒‍🧒

    One of the most important things to do before your vacation is make sure your Disney plans are connected to the correct account.

    Link your resort reservation

    If you’ve booked a Disney resort, linking your reservation allows you to access your hotel details and keep your trip information organized in the app.

    To get started:

    1. Open the app and tap the menu.

    2. Select the hotel reservations section.

    3. Choose the option to link a reservation.

    4. Enter the requested confirmation information.

    5. Check that your reservation appears correctly.

    You can generally find your confirmation number in your booking confirmation or through your travel agent.

    Link your park tickets and MagicBand

    Next, make sure your park tickets are linked to your Disney account. Depending on your ticket type and setup, you may also be able to link a MagicBand or other eligible admission media.

    Look for the tickets and passes section and follow the prompts to link your information.

    Why this matters: Having everything connected ahead of time makes it easier to manage your plans, check admission details, and prepare for Lightning Lane selections.

    Connect your family and friends

    Traveling with a group? The Family & Friends feature helps you connect with other people in your travel party so you can coordinate eligible reservations and plans.

    To connect with someone:

    1. Open the app menu.

    2. Select your Family & Friends list.

    3. Choose the option to add or invite a person.

    4. Follow the prompts to send an invitation.

    5. Have the other person accept it.

    Pay special attention to children’s profiles and who manages them. If someone else is helping coordinate the trip, make sure everyone understands which account manages each reservation.

    Group planning tip: Get your family and friends connected before booking Lightning Lanes or dining for a large party. Fixing account and linking issues in advance is much easier than troubleshooting them while everyone is waiting to make a selection!

    3. Understand the Disney World Map 🗺️

    The interactive map is one of the most useful features in the entire app. It helps you find attractions, restaurants, restrooms, character experiences, and other important locations throughout the parks.

    To open it, tap the map icon in the bottom navigation bar.

    From there, you can explore the park and select different categories to find what you need.

    Some helpful map categories include:

    ● Attractions and rides

    ● Character experiences

    ● Restrooms

    ● Dining locations

    ● Transportation

    ● Baby care centers

    ● Water bottle refill stations

    You can also select an attraction to view more information and available directions.

    How to use the map to save time

    Instead of walking across an entire park just to find a restroom or grab a snack, use the map to locate the closest option.

    You can also check attraction locations before heading in a particular direction. This makes it easier to group nearby attractions together rather than zigzagging across the park all day.

    My tip: Use the map as your day unfolds, not just when you first arrive. Your plans will change, wait times will fluctuate, and sometimes the best decision is simply to find the next fun thing nearby!

    4. Check Wait Times Before Choosing Your Next Ride

    One of the easiest ways to make your park day more efficient is to check attraction wait times regularly.

    The app displays current posted wait times for attractions when available, helping you decide whether to ride now, return later, or choose something else.

    To check wait times:

    1. Open the map.

    2. Select the attractions category or find a ride on the map.

    3. Tap an attraction to view its details.

    4. Check the posted wait time and any other available information.

    Standby lines versus Lightning Lanes

    Disney offers different ways to experience attractions, depending on the ride and its available options.

    Standby line: The traditional queue that guests can use without purchasing a separate Lightning Lane selection.

    Lightning Lane: An eligible attraction entry option that can help you spend less time waiting in the regular standby queue. Availability and booking requirements depend on the current offerings.

    Single Rider: Some attractions offer a single-rider queue for eligible guests willing to ride separately from their group. It may reduce waiting, but availability and wait times vary.

    Virtual Queue: Certain experiences may use a virtual queue when offered. Guests must follow the current joining instructions and applicable time windows.

    The best choice depends on your priorities, the attraction, and how busy the park is.

    My tip: Don’t automatically assume the ride with the longest wait is the one you should book or prioritize. Consider your family’s must-do attractions, location, available return windows, and the rest of your itinerary.

    5. Make the Most of Lightning Lane Passes ⚡️

    If you want to experience more attractions without spending as much time in traditional queues, Lightning Lane planning deserves a little extra attention.

    The app is where you can view eligible Lightning Lane offerings, make selections, and manage your plans.

    Because booking rules, eligible attractions, prices, and return windows can change, always check the current options in the app before your trip.

    Start with your must-do attractions

    Before making selections, create a short list of the rides your family absolutely wants to experience.

    Think about:

    ● Which attractions are your highest priorities?

    ● Which rides tend to have long waits?

    ● Which attractions are near one another?

    ● Which rides are most important for the kids?

    ● Are there attractions you can comfortably experience through standby?

    This gives you a strategy instead of simply booking whatever appears first.

    Pay attention to return windows

    A Lightning Lane selection generally comes with a designated return window. Review the time before confirming your plans and consider how it fits with other reservations.

    For example, you don’t want to schedule an attraction return window that conflicts with a dining reservation across the park if you can avoid it.

    Keep checking for new opportunities

    Your plans don’t have to remain exactly the same all day. Depending on the applicable booking rules and availability, you may have opportunities to make additional selections or modify existing ones.

    Check the app throughout the day, especially after completing attractions or when your plans change.

    My tip: Have a backup plan. Popular attractions may have limited availability, so know which rides are your priorities and which alternatives your family would enjoy.

    6. Use Mobile Food Ordering to Skip the Counter Line 🌯🌮🌭

    When everyone is hungry at the same time, food lines can feel like the longest part of your Disney day.

    Mobile food ordering can help you spend less time waiting to place an order and more time enjoying your meal.

    At participating quick-service locations, you can browse menus, customize eligible items, choose an arrival window, and place your order through the app.

    How mobile ordering works

    1. Open the app and select Order Food.

    2. Choose a participating restaurant.

    3. Select an available arrival window.

    4. Browse the menu and customize your order.

    5. Review your items and submit your order.

    6. When you arrive during your selected window, follow the app’s instructions to indicate you’re ready.

    7. Pick up your meal when the app notifies you that it’s ready.

    The exact steps and options may vary by restaurant.

    Why I recommend planning meals ahead

    Instead of waiting until everyone is starving, look at restaurant menus earlier in the day and decide where you might want to eat.

    You can also check the available arrival windows before committing to a location.

    My tip: If you’re traveling with kids, mobile ordering can be a lifesaver. Place your order before hunger takes over, and use the waiting time to enjoy the park rather than standing in another line.

    7. Make Dining Reservations Before Your Trip

    If you have your heart set on a popular table-service restaurant, planning ahead is important.

    Eligible Walt Disney World dining reservations can generally be made up to 60 days in advance, subject to the applicable booking rules.

    To make a reservation in the app:

    1. Open the app and select the dining reservations option.

    2. Choose your preferred date.

    3. Enter your party size.

    4. Search for restaurants.

    5. Review available reservation times.

    6. Select a time and complete the booking process.

    Planning for a large group

    Traveling with a big family or multiple households? Dining reservations can be more challenging when you’re trying to seat everyone together.

    If you can’t find availability for your entire group, consider whether splitting into smaller parties is an option. However, separate reservations do not guarantee nearby tables or that the restaurant can seat everyone together.

    Make sure each reservation has the correct party size and that everyone understands the plan.

    Don’t forget to manage your reservations

    Your dining reservations should appear in your plans within the app when properly linked.

    If your itinerary changes, review the restaurant’s cancellation policy and update your reservation as needed. Cancellation fees may apply to some reservations.

    My tip: Don’t book every meal just because you can. Choose the dining experiences that matter most to your family and leave room for flexibility during your park days.

    8. Explore the Tip Board for Real-Time Planning

    The Tip Board is a helpful feature for making decisions throughout your park day.

    Depending on the current app layout and available offerings, it can show attraction wait times, Lightning Lane return windows, and personalized recommendations.

    Rather than treating your itinerary as a rigid schedule, use the Tip Board to adjust your plans as the day unfolds.

    For example, you might discover that an attraction you’ve been hoping to experience has a shorter wait than expected. Or you may notice a return window that works well with your next planned activity.

    How to use the Tip Board effectively

    ● Check attraction availability throughout the day.

    ● Review Lightning Lane return windows.

    ● Use available park filters to narrow your options.

    ● Consider nearby attractions before walking across the park.

    ● Revisit your plans when wait times or availability change.

    My tip: Build flexibility into your Disney itinerary. A good plan gives you direction without requiring every minute of your day to happen exactly as expected.

    9. Capture Your Memories With Disney PhotoPass 📸

    You’re going to make so many memories on your Disney vacation, and PhotoPass can help you capture them.

    Disney PhotoPass offers photography services at participating locations, including select attractions, character experiences, and photo spots around the parks.

    Depending on the experience and your purchases, photos may be linked to your account through eligible methods such as a MagicBand or other supported linking options.

    How to view your photos

    1. Open the My Disney Experience app.

    2. Find the PhotoPass or photos section.

    3. View available photos linked to your account.

    4. Follow the instructions to download or purchase eligible photos.

    Some photos or downloads may require an additional purchase or eligible photo product.

    What if your photos don’t appear right away?

    Don’t panic if a photo isn’t immediately visible. Follow the app’s instructions for locating or linking photos, and keep any relevant attraction details or photo identification information available.

    Also, pay attention to the applicable retention period for your photos so you don’t miss the opportunity to download or purchase them.

    My tip: Check your photos periodically during the trip. It’s much easier to catch a missing photo while you still remember where and when it was taken.

    10. Find Characters and Entertainment

    Meeting characters is often one of the highlights of a Disney vacation, especially for younger guests.

    The app can help you find available character experiences and other entertainment information.

    Use the map and available filters to explore character locations, shows, and other experiences. Select an option to see additional details, including schedules or location information when available.

    This can be especially helpful if you’re trying to fit a character meet-and-greet into an already busy day.

    My tip: If meeting a particular character is a priority, check the available information early in the day and plan around the posted schedule. Experiences and appearances can change.

    11. Get Familiar With Disney Transportation

    Getting around Walt Disney World is part of the experience, but transportation can also affect how much time you have in the parks.

    The My Disney Experience app can help you explore routes and directions, while Disney offers several transportation options depending on your destination.

    These include:

    ● Buses: Connect many Disney resort hotels with theme parks and other destinations.

    ● Monorail: Connects select resorts and destinations, including Magic Kingdom and EPCOT through the available routes.

    ● Boats: Serve select resort and park routes.

    ● Disney Skyliner: Connects select resorts with EPCOT and Hollywood Studios.

    ● Walking paths: Available between certain destinations.

    ● Minnie Van service: A separately priced transportation option available through the applicable service and booking process.

    Not every transportation option serves every destination, so check the current route information before heading out.

    How to find directions

    Use the map and available directions features to select your destination and review the suggested route.

    Allow extra time for transportation, security screening, walking, and boarding. A destination that looks close on a map may take longer to reach than expected.

    My tip: Always account for transportation when making dining reservations or planning park hopping. A reservation across property requires more than just the time listed on the reservation itself.

    12. Check Your App Settings Before You Leave Home

    A few minutes spent reviewing your settings can make your vacation easier.

    Open the app menu and look for Settings. Depending on your device and the current app version, you may find options related to notifications, location access, measurement units, tickets, and other preferences.

    Here are a few things worth checking:

    Notifications: Enable relevant notifications so you can receive important updates about your plans and experiences.

    Location access: Review your device’s location permissions if you want location-dependent features to work while you’re in the parks.

    Tickets and plans: Confirm that the correct tickets and reservations are linked to your account.

    Measurement units: Choose your preferred units where the app offers that setting.

    MagicBand or card: Review the available options for linking or managing eligible admission media.

    Also, make sure your phone is charged before heading into the parks. The app can be used throughout the day for tickets, directions, reservations, and planning.

    13. Troubleshooting Common My Disney Experience App Problems

    Technology isn’t always magical, and occasional app issues can happen. Knowing a few basic troubleshooting steps can save you frustration.

    Your tickets aren’t showing up

    Check that you’re signed into the correct Disney account and that the tickets have been linked successfully.

    If the tickets still don’t appear, review your confirmation information and contact Disney support or Guest Relations for assistance as appropriate.

    Your dining reservation is missing

    Confirm that you’re viewing the correct account and that the reservation details were entered correctly.

    If you booked through another person or a travel agent, check whether the reservation needs to be linked to your account.

    You can’t see or connect with family members

    Review your Family & Friends list and make sure the invitations have been accepted. Check the account and profile details if the connection still isn’t working.

    The app freezes or crashes

    Try closing and reopening the app. Check your internet connection and make sure the app is updated. If the problem continues, restart your phone or follow the app’s current troubleshooting guidance.

    Your PhotoPass pictures aren’t appearing

    Check the photos section and follow the instructions for linking or locating missing photos. If necessary, contact Disney PhotoPass support with the details of your experience.

    You still need help?

    Use the Help or Guest Services options available through Disney’s official channels. Cast Members can also help direct you to the appropriate support while you’re at the resort or in the parks.

    My tip: Take care of account setup, ticket linking, and reservation issues before your vacation whenever possible. Those are the last things you want to troubleshoot when you’re trying to enjoy your first ride of the day!

    14. My Favorite Tips for Using the App Like a Disney Pro

    Now that we’ve covered the major features, here are a few simple habits that can make a big difference during your vacation.

    1. Favorite your must-do attractions. Use the available favorite feature to keep important attractions easy to find.

    2. Use map filters. Narrow your search to attractions, restrooms, dining, or whatever you need at that moment.

    3. Order food before you’re hungry. Check menus and arrival windows in advance rather than waiting until mealtime.

    4. Bring a portable charger. You’ll likely rely on your phone throughout the day, and keeping it charged is essential.

    5. Refresh your plans regularly. Availability and wait times change, so check the app as you move through the parks.

    6. Download or save important information when possible. Keep reservation confirmations and other essential details accessible in case you need them.

    7. Don’t forget about merchandise checkout. The app may offer mobile checkout at participating shops, which can help you spend less time waiting at the register.

    8. Check your PhotoPass gallery. Make sure your memories are appearing as expected, and follow the applicable download or purchase requirements.

    9. Keep your plans flexible. Use the app to guide your day, not dictate every minute of it.

    10. Remember that you don’t need to use every feature. Learn the tools that matter most to your family and build from there.

    Final Thoughts: Let the App Do Some of the Planning for You!

    The My Disney Experience app can feel overwhelming at first, but once you understand the basics, it becomes one of the most useful tools for your Walt Disney World vacation.

    From keeping your tickets and reservations organized to finding attractions, managing Lightning Lanes, ordering food, and navigating the parks, the app helps bring so many parts of your trip together in one place.

    My biggest piece of advice? Get familiar with the app before your trip, make a plan for your must-do experiences, and give yourself permission to be flexible.

    Disney vacations are about making memories, spending time together, and enjoying the little moments. The app should help you do more of that, not add another layer of stress to your day.

    If you’re planning a Disney trip, save this guide so you can come back to it as your vacation gets closer!

    And if you’re looking for even more ways to simplify Disney planning, explore the other guides here at Daily Whimsy, where I’m sharing practical tips, helpful checklists, and planning tricks to make your next Disney vacation a little easier and a lot more magical.

    Happy planning, and may your Disney days be filled with more magic and less stress!

    Planning a Disney trip? Start here!

    ● Explore more Disney planning tips and tricks.

    ● Check out my Disney Lightning Lane Strategy Guide.

    ● Browse my Disney packing guide to help you prepare for your park days.

    ● Visit my Magic Made Simple Etsy shop for helpful Disney planning guides and printables.

    Disclosure: This post may contain affiliate links. If you make a purchase through an eligible link, I may earn a commission at no additional cost to you. I only share resources and recommendations I believe can be helpful to my readers.

    Note: My Disney Experience app features, menu layouts, booking rules, prices, and availability can change. Always check the official Disney app and website for current information before your visit.

    Magic Made Simple 🩷

  • Christmas Shopping Guide for the Disney Gal 🎀

    Shopping for a Disney lover this Christmas? 🎄✨ Whether they’re dreaming of their next Disney vacation, obsessed with Mickey Mouse, or love bringing a little Disney magic into everyday life, this Christmas shopping guide is packed with gift ideas they’ll adore! From must-have park accessories to cozy Disney favorites and fun finds on Amazon, there’s something magical for every Disney fan and budget. 🎁🏰 Ready to make their Christmas extra magical? Keep reading, explore these must-have Disney gifts, and shop your favorites before they’re gone! ✨

    For the Disney Adult

    Jewelry:

    Bauble Bar Bracelet – comes in other character themes!
    Little Words Project – Cinderella Bracelet
    STUNNING Kendra Scott Disney Necklace
    Bauble Bar – Mickey Earrings
    Disney – Paperclip Mickey Earrings
    Kendra Scott x Disney Snow White
    Travel Jewelry Case – Perfect packing tool for a Disney Vacation!

    Accessories:

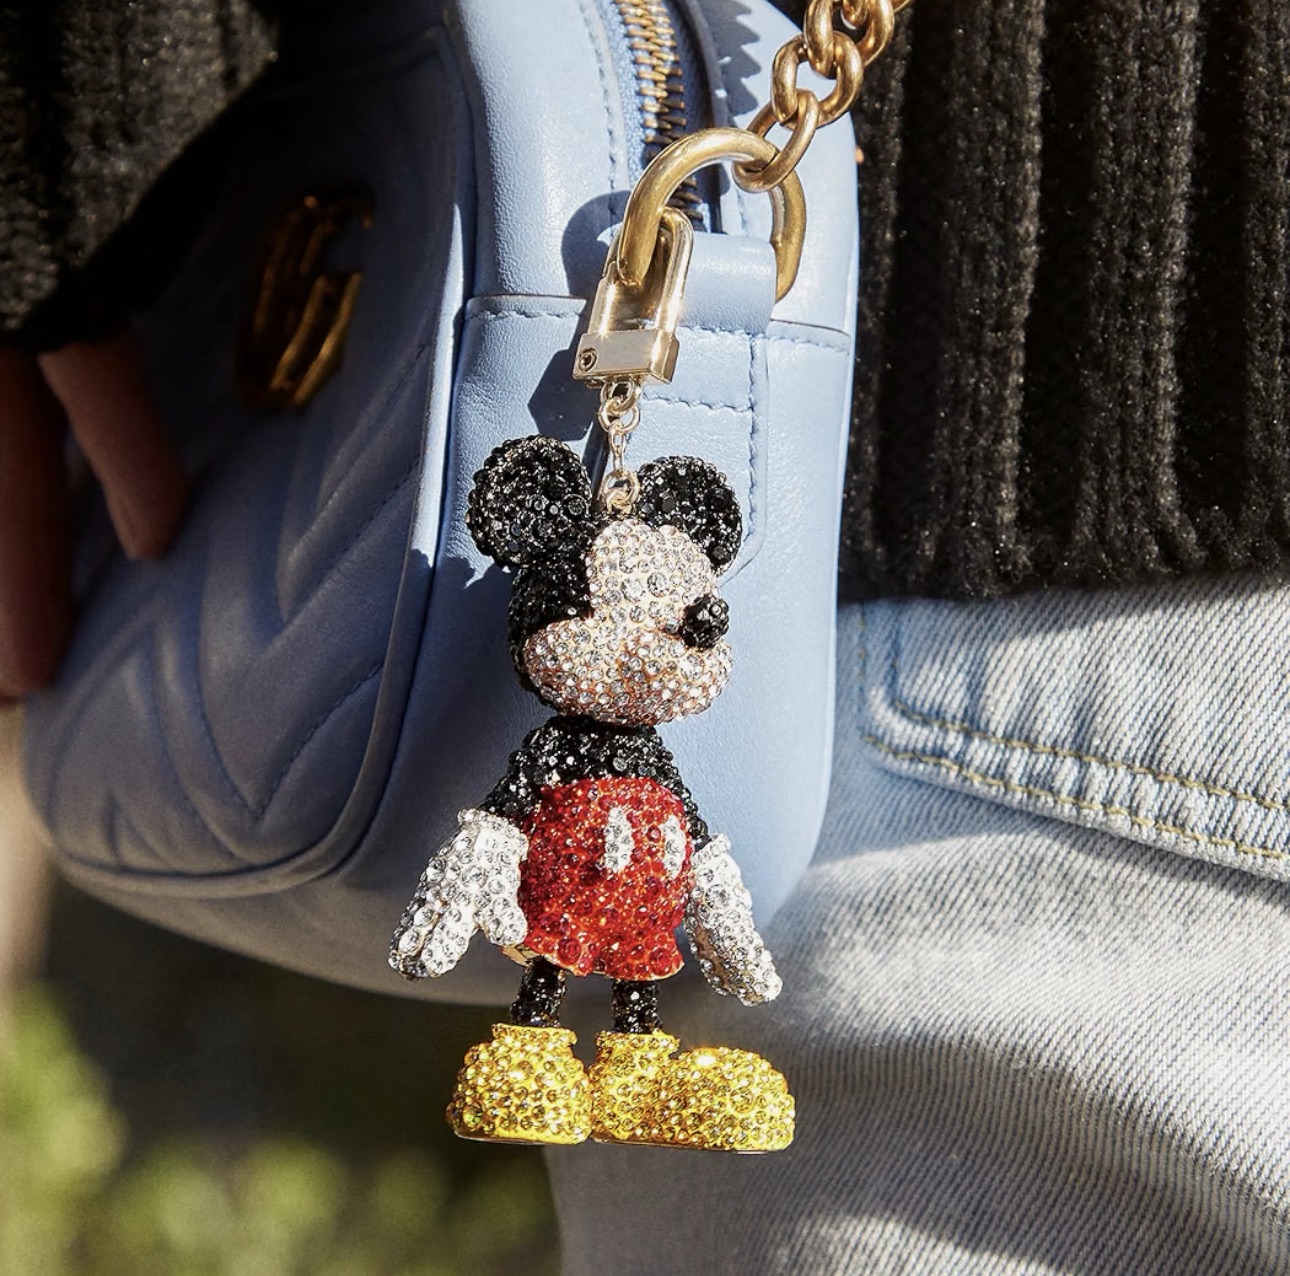
    Obsessed with these bedazzled bag charms, honestly need them in every character!

    Mickey
    Stitch
    Buzz Lightyear
    Perfect for your Disney Parks bag
    Loungefly – Mystery mini backpack keychains!
    Viral Popmart Disney Plushies
    Lizard Clicker – perfect fidget stocking stuffer
    Cannot go wrong with a Cutie Cuff
    Disney Doorables
    Cutest Doorables/Plushie Doll combo, these will be a must have this season

    Make-Up/Skincare:

    Colourpop Lip Gloss – Tangled
    Colourpop – Stitch Eyeshadow Palette
    Pooh Lip Mask/Scrub
    Makeup Eraser Set
    Monsters Inc Skincare Mask

    Whether you’re shopping for a fellow Disney lover or treating yourself to a little Disney magic, I hope this guide helps you find something special! Every item on this list has been thoughtfully curated by me, featuring brands I know and love and products I genuinely believe are worth considering. My goal is to share quality finds that bring a little extra magic to your Disney adventures and everyday life. Happy shopping, and may your holiday season be filled with a little extra pixie dust!